![]()
How to install a remote probe for PRTG Network Monitor in 4 steps

What is a remote probe?
With remote probes, you can monitor different subnetworks that are separated from your PRTG core server system by a firewall to keep an eye on remote locations. You can install one or more remote probes.
Remote probes are also useful if you want to distribute monitoring load by taking it from the PRTG core server system and putting it on one or more remote probe systems.
![]() Please note that the following steps refer to PRTG Network Monitor. For PRTG Hosted Monitor, different rules apply.
Please note that the following steps refer to PRTG Network Monitor. For PRTG Hosted Monitor, different rules apply.
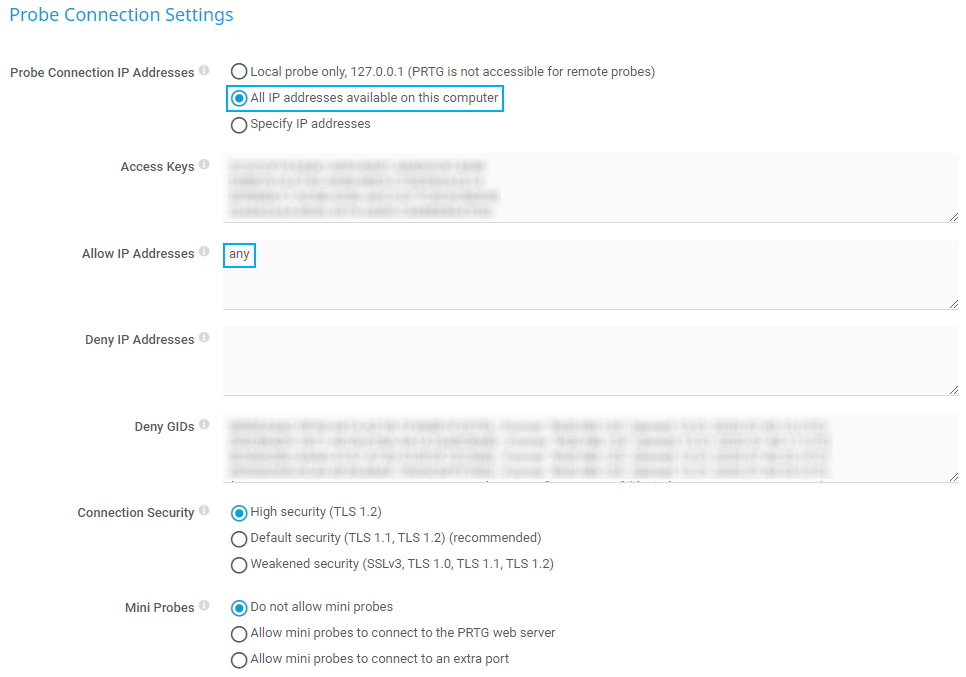
- From the main menu in the PRTG web interface, select Setup | System Administration | Core & Probes and go to section Probe Connection Settings.
- By default, PRTG a core server accepts connections from the Local probe only, 127.0.0.1. This setting is the most secure setting, but it does not allow any remote probes to connect to your PRTG core server. To accept remote probes, select All IP addresses available on this computer. This way, any IP address on your PRTG core server system accepts incoming probe connections.
- In the Allow IP Addresses field, enter the IP address of the computer that you want to install a remote probe on.
- Enter the word any to set the PRTG core server to accept remote probes that connect from any IP address.
Note: If you use any, make sure you write the word in lowercase only. Any other variations are invalid. - Leave all other settings as they are and click Save.
- PRTG now needs to restart the PRTG core server to apply your changes. After clicking Save, a dialog box appears that asks you to confirm the required PRTG core server restart. Click OK to trigger the restart and follow the instructions.

![]()
Log in to the PRTG web interface
-
On the system that you want to install a remote probe on, log in to the PRTG web interface.
![]()
Add remote probe
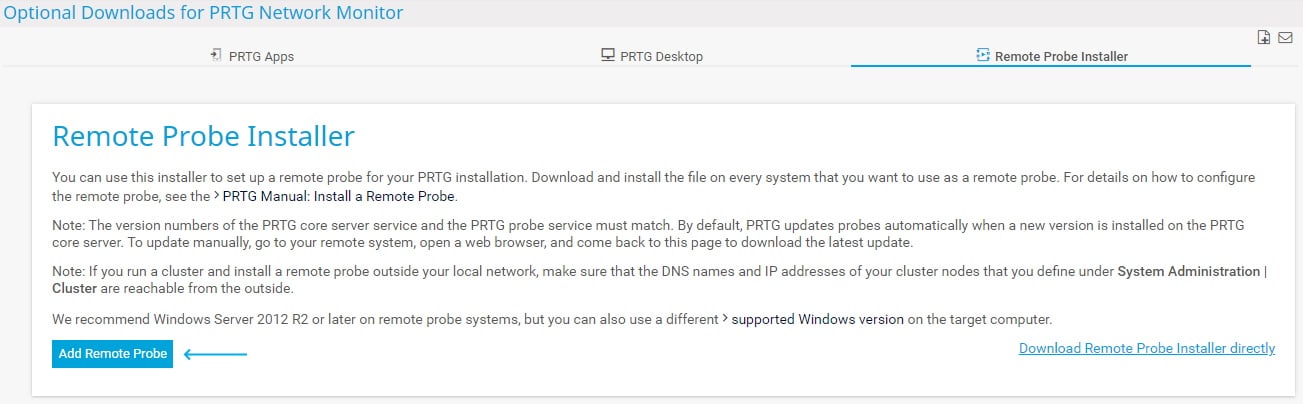
- From the main menu bar, select Setup | Optional Downloads | Remote Probe Installer.
- Click Add Remote Probe to start the installation assistant.
![]()
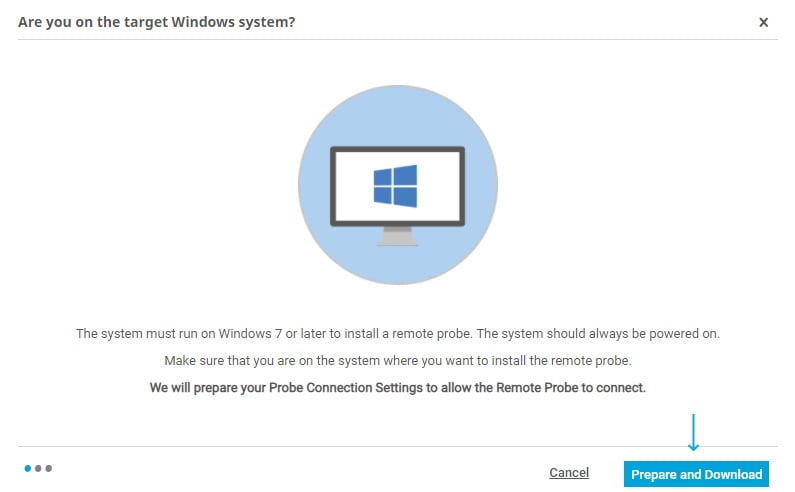
Prepare and download
- In the dialog that appears, click Prepare and Download to start the download of the installer.
- Save the setup program to your local disk.
Add remote probe
Prepare and download
1. Execute setup program
-
Execute the setup program that you downloaded.
2. Confirm Windows dialog
-
Confirm the Windows User Account Control dialog with Yes to allow the installation.
-
The usual software installation wizard will guide you through the installation process.
3. Start installation process
- Click Install to start the installation process of your remote probe.
- Wait until the installation is completed. The remote probe automatically connects to your PRTG core server.
- If the remote probe successfully connected to your PRTG core server, you can complete the setup of your new remote probe.
4. Finalize installation
- Click Continue to finish the remote probe installation.
- Finally, click Finish to exit the installation wizard.
- The remote probe is now installed on your system as a Windows service.

Start installation process

Install remote probe
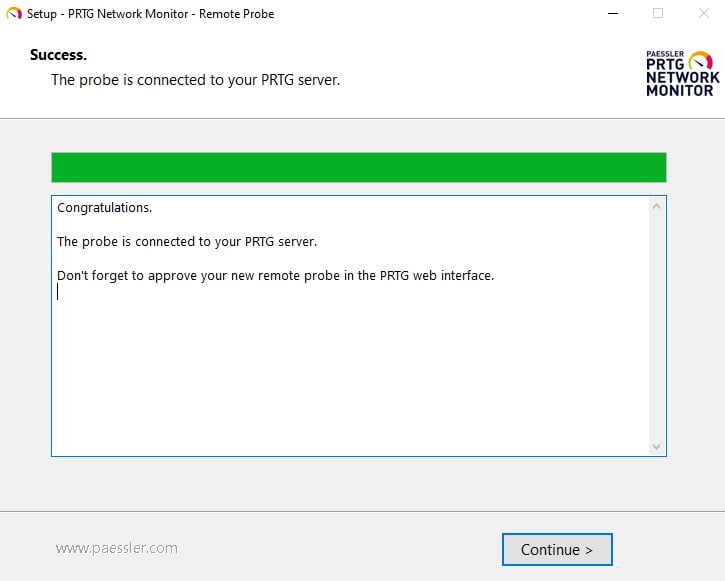
Successful installation
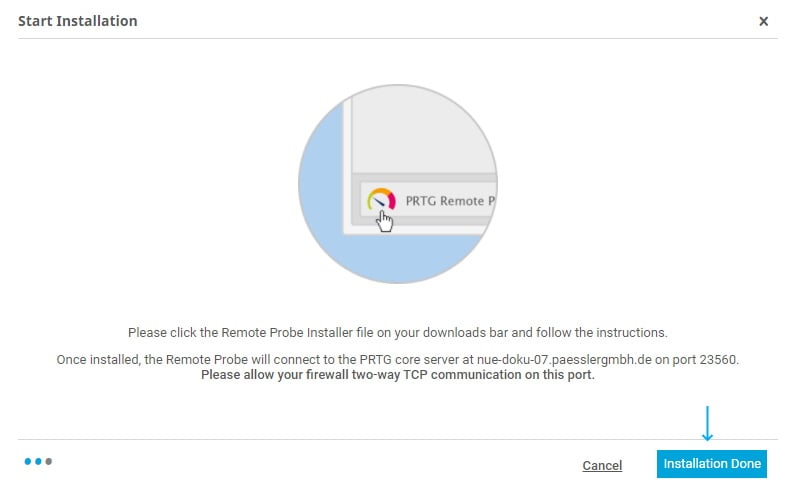
Installation done
In the installation assistant, click Installation Done
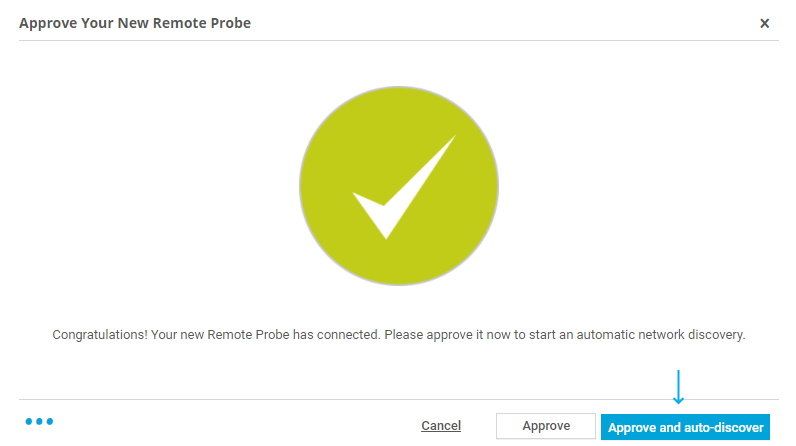
Approve and auto-discover
Click Approve and auto-discover to include your new remote probe device and network in your device tree and to start the PRTG auto-discovery. It helps you discover devices and automatically creates suitable sensors.
Optionally, you can also choose to only approve your remote probe without starting an auto-discovery by clicking Approve.
The remote probe appears as a new object in your device tree. You can now create groups, devices, and sensors to start monitoring.
This how-to guide only scratches the surface?
Get more deep-dive information here!
Get more deep-dive information here!